

Searching for a chicken coop?
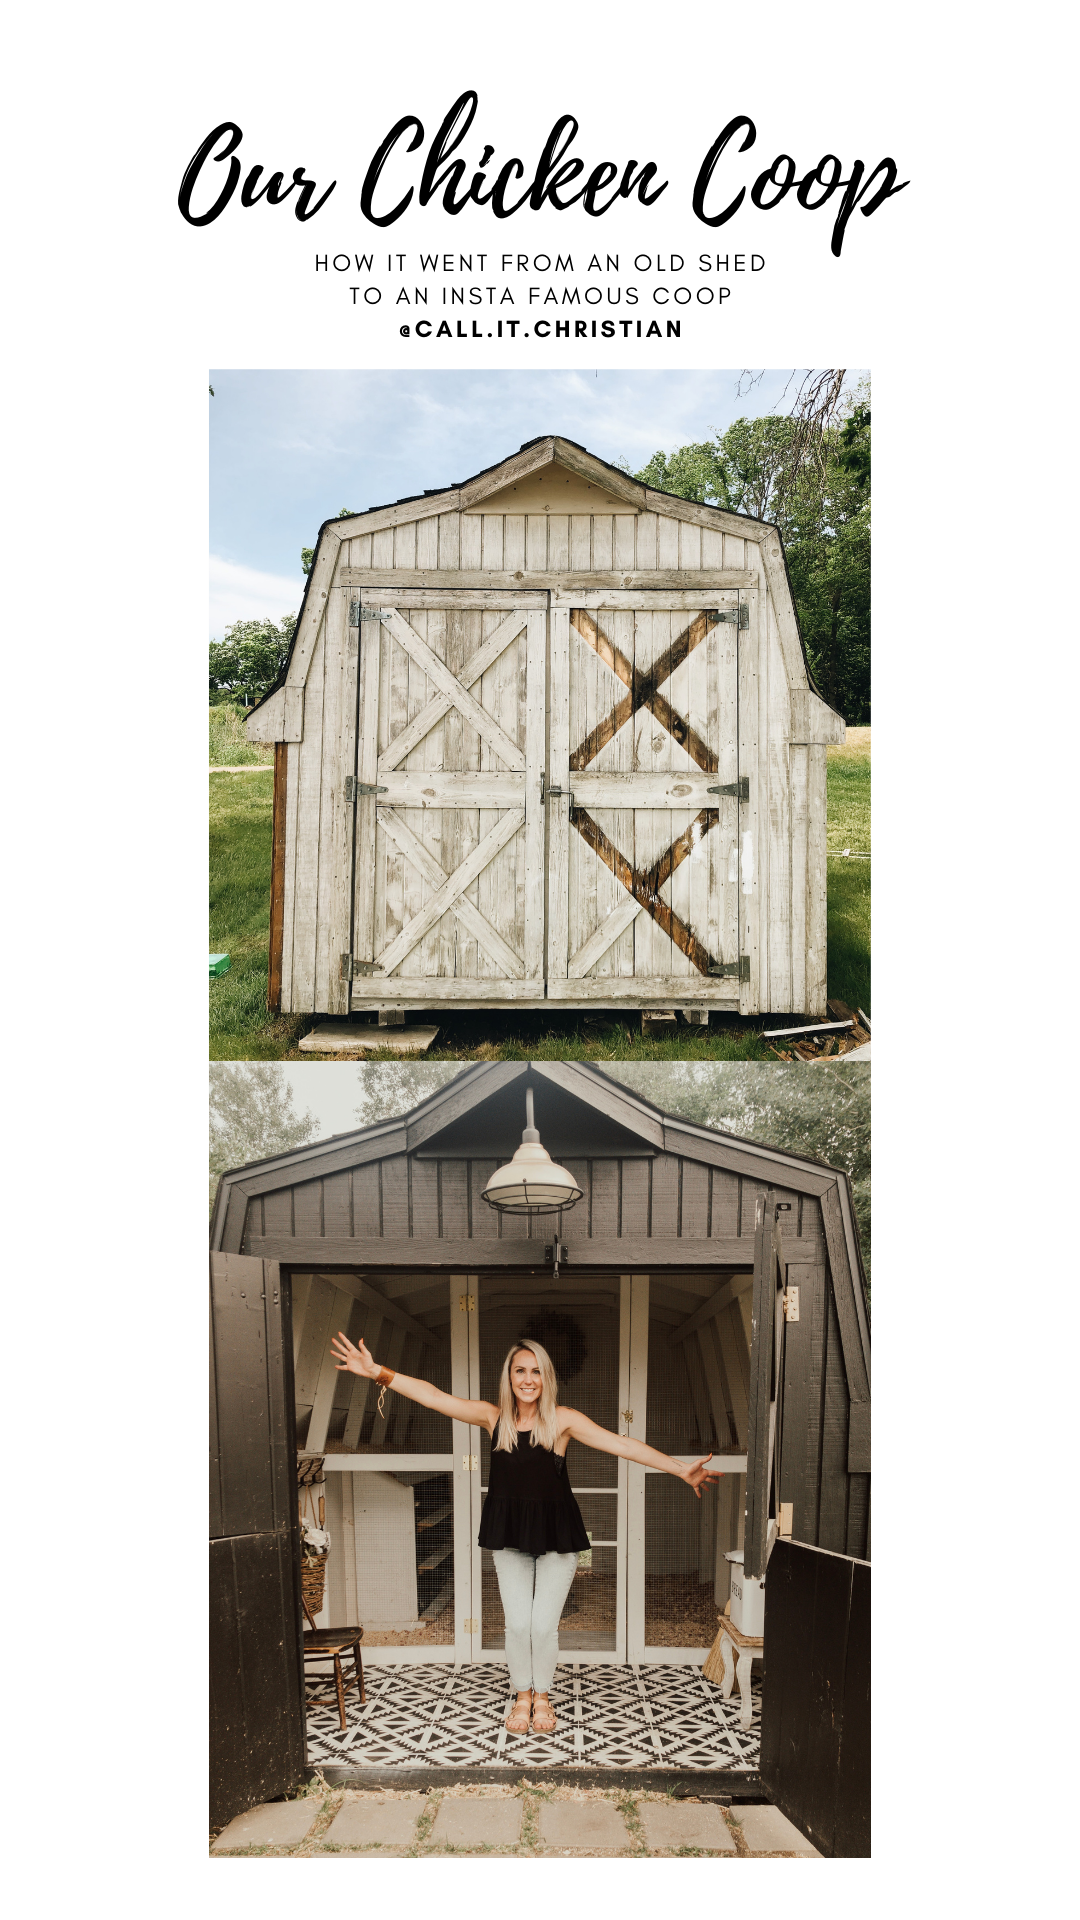
Maybe you could use an old shed? Here lies the answer to our number one asked question and most popular topic: How we designed our chicken coop! Let’s chat…
There once was an old shed on my parent’s lakeshore that needed a new home. PICK ME!!! I instantly knew what I wanted to do with this old shed when I saw her. The shed had a bad roof, some rotten wood, and even moldy spots inside. It almost went to the burn pile. Insert me and a tow truck with a flatbed trailer and BOOM our new shed arrives. Common question 1: The tow truck cost about $600 to have the shed moved 45 mins up the road. A bargain in comparison to similar sheds costing thousands of dollars. Once it got here…the work began.
First, we removed all the old rotten boards and replaced them with new ones. We gave her a new roof (black shingles) and added gutters. The gutters drain into rainwater barrels (but that is for another post). The inside was pressure washed and we started to frame. Luckily, my husband was a framer back in high school and his skills still come in handy. We framed up a wall separating the front 1/3 from the back 2/3.
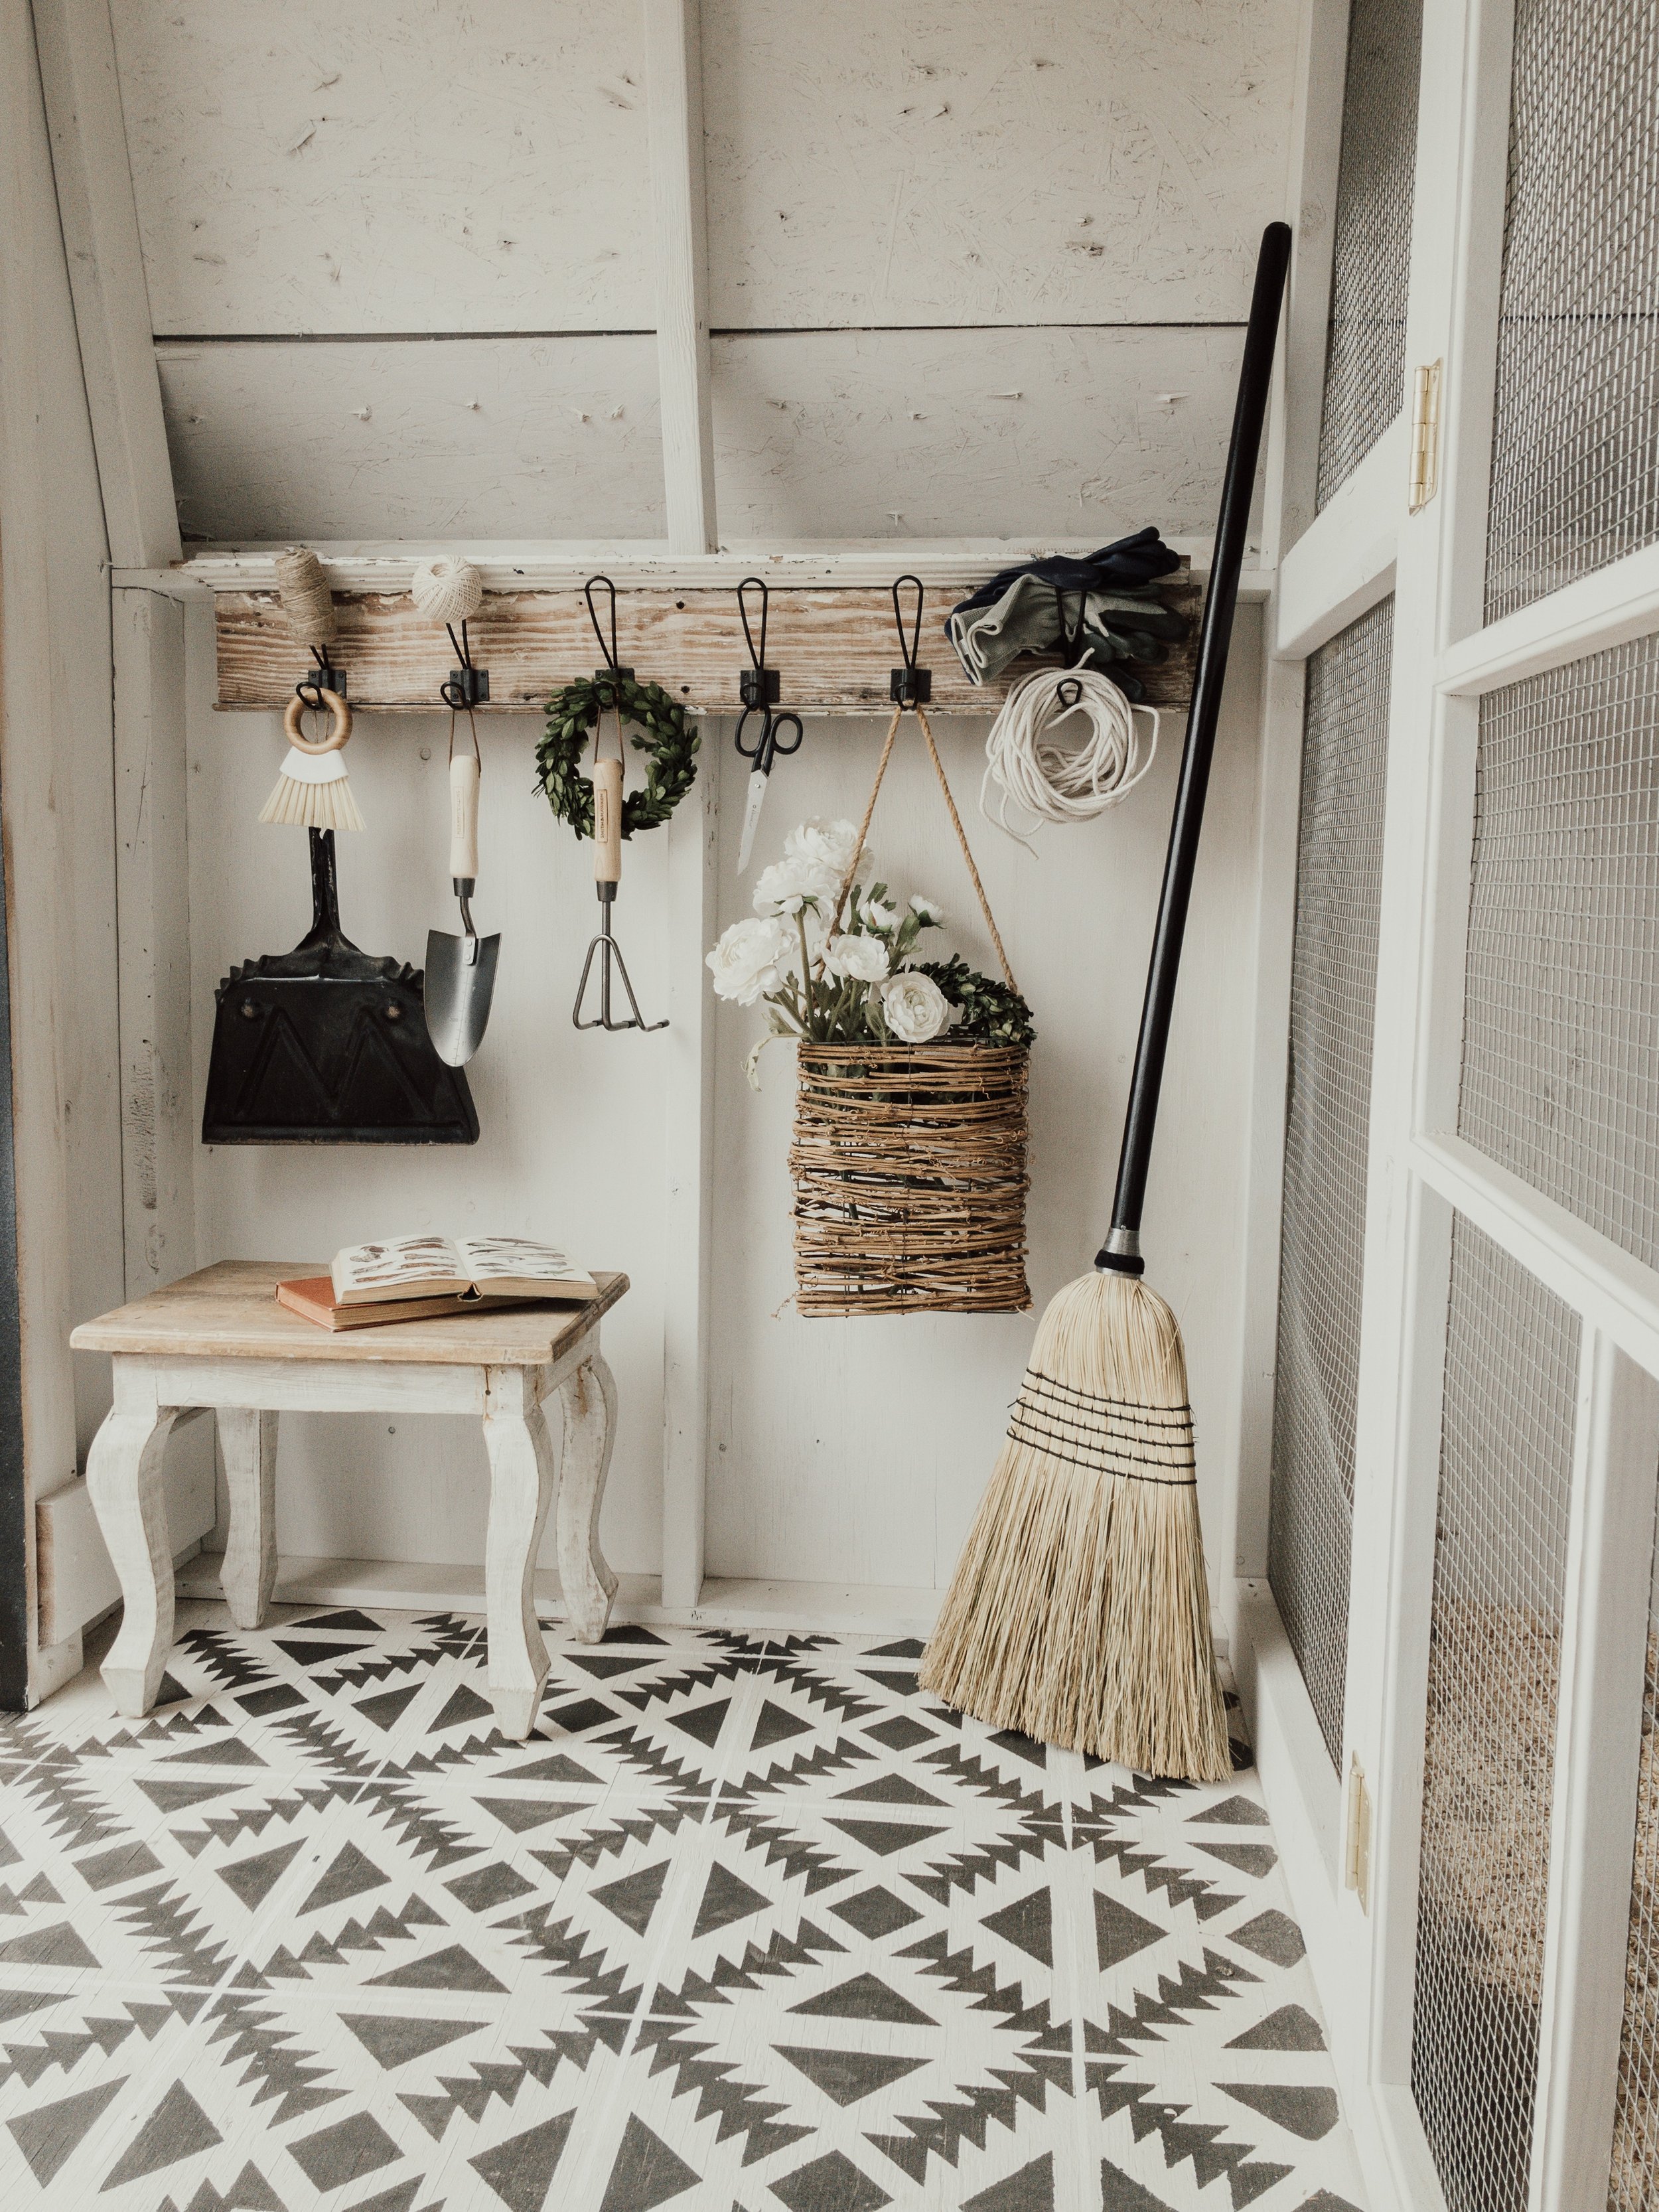
Why did we do this? Simply, chickens are messy. We prefer to be clean. IE: They have their area and we have ours. I wanted a stylish, pretty coop- minus the poop. Here is the answer! The front is decorated to my liking and here we store all the chicken feed, bedding, supplies, etc.
The back of the coop contains chickens, nesting boxes, roost, food and water, and heating/lighting (for winter months and/or baby chicks).
Here is a sneak peek…but keep on reading!
Framing continued. As you can see we framed in a screen door. We removed the actual screen and put up hardwire cloth (or goat fencing) across the whole “wall.” You could also use chicken wire.
Next, we painted. KILZ to the rescue! If you aren’t familiar with KILZ paint, it removes stains, smells, and mold. The painting was not done by hand. Don’t even try. Get yourself a paint sprayer. (All my supplies are linked here).
The exterior was sprayed SW: Black Magic with Glidden exterior paint.
Floor tiles? Hand-painted! I used a stencil, stencil brushes, and the same paint. I ended with a coat of poly. to protect it. A year later, after multiple pressure washes, still holding up great!

It’s super important to add a vent. Chicken coops need to breathe! (See Image above). We also cut out some darling chicken-sized barn doors. Now that we have an automatic chicken door, we rarely use them. In case of auto chicken door failure, they are needed. In hindsight- I would make them larger, so when cleaning you can just shovel everything out the back into a wheelbarrow. Next coop!
We made our nesting boxes out of milk crates (also for another post). Our roost is a long 2x6 that spans the width of the coop.
We added electricity (an exterior barn light and an interior light for me). We have the exterior light on a timer. Free Range Note*** Make sure the exterior light does not come on until the chickens have gone to bed!! I’m totally serious. If the light comes on, they assume it’s still daytime and they’ll try to remain outside and party into the night.
I think that about wraps it up! Here is the link to my Amazon storefront, where I’ve created a “chicken products” store with all the items (and more to re-create this coop yourself. Go Chicken Shopping Here
You can do it!